We've Moved

HEY EVERYBODY, WE'VE MOVED

Our blog had gotten too large, and it was getting to the point where it was difficult to comb through looking for specific posts or information. So we have developed a new blog at SailingVita.ca Come and see whats happening now.

Friday, April 27, 2012

What a week...

Its been 6 days since my last post, it would have been sooner, but my internet has been down. Every time it rains we lose our phone. I should call and have them fix that. So anyway, Sunday I worked on landscaping, Monday I drove to Peterborough to get more marine plywood, Tues was a rain day, so I stayed in the shop and finally got it cleaned up, Wednesday I started putting the boat back together, yesterday was a rain day and I stayed in the shop, and did some landscaping. However, I did manage to get a few things started.

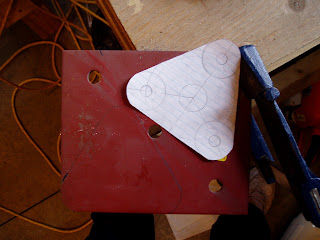
This is the new and improved version of my first cup holder. I tried to add the mount for the chart plotter, and was successful, but I was not happy with the strength, and decided it should be one piece, so I built this one. The back is all one piece, including the triangle piece in the photo, which is the mount, and the top portion fits around it. Here it is with the first coat of Cetol.
 The interior of the fridge box finally got all glassed in. I sanded it down yesterday, taking all the bumps off, and then thickened up some epoxy to smooth it out even further. A couple of applications like that and then a final sand, and it will be ready for gel-kote. Its kind of like finishing drywall, except this stuff is toxic, and doesn't sand quite as easy.

Next came the anchor windlass. This setup has cost me a lot of lost sleep. Trying to figure out the best way to mount this. I finally decided to cut the door in half, permanently mount the front half of the door, and hinge the back part of the door off of the front half. This does a few things, it keeps the anchor windlass as close to the bow as possible so that the chain is not running across the deck grinding down the gel-kote, keeps the foredeck relatively clear, maintains use of the the deck locker for bow lines, and snubbers, etc... Makes sure that the door does not open when green water comes over the deck. And, allows room for the dinghy to fit between the mast and the windlass, for those times when it is just better to have it mounted on deck.
 I toyed with mounting the windlass in front of the door, with mounting it behind the door, with getting rid of the door, or mounting the windlass inside the locker. All things considered, to my feeble mind, this was the best of all worlds.
 Then I took an idea from the Guru of small boat Guru's, James Baldwin, and mounted the windlass and the two deck pipes up on blocks. I probably should have made them out of teak, but I don't have any, and at $32.00 per board foot plus tax (price confirmed), I'm not likely to ever have any. However, for weather, cedar works just as well, is strong, is light, and is in my shop. I made the base for the windlass out of 2" stock and the base for the deck pipes from 1" stock. And the reason is because I can't get the deck pipes close enough to the windlass to allow the chain to properly fall straight in and still be able to remove the cap from the deck pipe without having the windlass that extra inch higher. And if I remember, James's reasoning was to limit the amount of deck water that found its way below, so it works for that too.
 I routed out the bottom of the 2" block so that the deck pipes could be inset, and as close as possible to the windlass. This also helps keep them in between the edges of the hatch, because there isn't a whole lot of room to work with there.
 And here they are with the first coat of Cetol. I figured I might as well finish them up in the shop and then install them. I have time, as the door needs to be bulked up, and glassed into the deck prior to installation.
Today is cold as hell. So no epoxy or paint. I think I'll try and get the bowsprit sanded down, tape off the boot strip so I can finish that, put the stuffing box back together, and what ever else takes my fancy. It is so hard to get things done when it is this cold out. Right now the weather man says we have a -5 deg C windchill. Brrrrr... I'll play around in the shop as long as I can get away with it. Tomorrow is first lift in, so will be a busy day, Sunday and Monday should be good work days, and Tues is supposed to rain again. Its okay though, Tues is shopping day, I have a big order waiting at Pride Marine, and my davits are ready. Can't wait to get them on, then I can get the name and port of call installed.

Until later.

Rob.

Saturday, April 21, 2012

Almost ready to Rebuild

Nothing boat related today. There was a work party at the Yacht Club, and I was tired out this afternoon, and ended up napping. I did spend some time researching and designing the propane system this at 04:00 this morning, and jotting down some notes about the rebuilding.

Yesterday though I spent the day at the boat, worked on moving the engine controls, and spent the rest of the day cleaning. Or chatting, or drinking beers, helped a fellow sailor remove and replace his swing keel, etc...

 The above pic is my inspiration for the engine control panel being moved up from the below my feet. This is Franco's boat. This little mod was done by the previous owner who did a lot of work to the boat. I am hoping to recess mine a little more and put a plexiglass panel over it for protection. Problem is that there is only so much room behind here.
 I started taking it apart before I remembered the before picture. Can't wait to get it out of this location.
 And here is the hole in the back of the starboard cockpit seat. There was enough cabling to relocate the panel here, so I didn't have rewire the panel, that was nice. I have to build the box that fits in here, and then mount the panel. This will probably be my first kick at the cat with gelcoat. If I can match the colour and do a good job, then I will be ready for the bigger job of the new cockpit seat.
Also re-installed the newly finished steps for the ladder. The chandlery couldn't get me robertson head screws, but the hardware store has them. Too bad I didn't figure that out before I installed them. Hindsight is always better, and if it could be relied on would probably have saved me a lot of money over the years.

Need to buy more plywood to finish the inside of the boat, but the store I am buying it from is not open on Sundays until May 6th, so tomorrow is a stay at home day. Monday and Tuesday are rain days, so looks like Wednesday for the rebuild beginning. Until then, I'll work on the fridge box, propane lockers, cockpit table, new drink holder, etc....

Later. Rob

Thursday, April 19, 2012

My Arms Hurt...

I hate fiberglass. If I didn't mention it before, its probably because I was trying to forget the last time I went near the stuff. My forearms are the worst, with the back of my neck being a close second, for the itchy and scratchy show. Of course scratching only makes it hurt more. Luckily I am getting closer to being done.

I tore apart all the major parts that were left. Took out the liner from the old starboard quarter berth turned cockpit locker. Removed the rest of the galley, and took apart the old ice box.

 Here you can see through the cockpit hatch. I left some of the liner in, and will epoxy it to the hull in order to keep some rigidity left over in the pieces that are there. I tried getting in and out of the hatch, and I just fit. So that is great news. Serena will fit better than me. Mind you, I need to stop hitting my head off of things down there, or I am going to be egamad. See, look, I am already spelling things backwards.
 Starboard liner cut out. I left some pieces in that will get attached to the new kitchen parts. Looks relatively clean now, but I had to take pictures after I had already vacuumed up, one, because Serena might see them, and two, because I was afraid to take my camera in there.
 During the survey there was a wet spot in the deck that was bad enough that it needed to be dealt with. Well, today I found it. Turns out it is one of the hull to deck bolts. Its hard to tell with the photo, especially since I ground out all the rotten wood. It wasn't that bad though, and now I can effect the repair. Some 3M 5200 sealant and some epoxy should take care of it nicely. Like they say about water though, where its wet, is not necessarily where the water is coming in. In the photo, the bolt on the right was where most of the rot was, but the bolt on the left is where the leak was.
When I pulled the liner out and the pan was cut out of the hatch, there was a little bit of fiberglass next to the engine that wasn't holding on to much, so I cut it out too. Did it ever open up access to the engine and steering mechanisms. I will be leaving that open, just covered up with a piece of plywood so that it can be removed when needed. Woohoo, score...
 Removed all the pieces from the galley, and cleaned it up. Ready for a new galley, but I have to finish the fridge box which is out in the shop. I work a little on it everyday, but when you can only do one of the sides per day, its a little slower. Epoxy doesn't like it when it is anything other than laying down. Unless of coarse you thicken it, but then it is really hard to wet out the fibreglass cloth.
 Picture doesn't show much, just more of what I did yesterday.
And this is where the old ice box used to be. What a pain in the buttocks getting this out. The ice box itself is made of fibreglass covered with gelcoat, just like the hull. It is mounted, and then they spray foam the whole thing in place. So I had to cut it all up into pieces and pry everything out. It took a long time. This will become storage cupboards, and I will be raising the desk height 4" the same as the galley, and setee, so I'll put a drawer underneath it.

I was really impressed how well the ice box was insulated. The port side had 2 1/2", the aft side had 2", the forward side had 1 1/2", the top had 1", and the bottom/back started with nothing down at the bottom and made it too as thick as 5" on the way up and around the back. If we were staying in Canada this would have made a fine fridge, but in the tropics it wouldn't cut quite cut it.

Tomorrow I am going to relocate the engine controls. They are down low in the cockpit in the way of my feet, and I am always afraid that I am going to knock off the key with a misplaced shoe. And then clean. The whole boat, inside and out is covered in a layer of white dust. Its nasty...

Later, Rob.

Wednesday, April 18, 2012

Oh, the Destruction...

Spent the day ripping apart the boat. It started out poorly, using a masonry cutting wheel on my angle grinder, and a metal cutting blade in my reciprocation saw. I managed to cut out the opening under at the helm seat, then I showed it too Rick the guru. He mentioned that I should use a diamond blade in the grinder, and a course blade in the reciprocating saw, so off to Canadian Tire I went.

But I am getting ahead of myself. Before I could make a cut, I had to remove the seat. In order to get the bolts removed from the hinge, I had to put a pair of vise grips on the nut, close the seat, and use a screw driver to unscrew the bolt. Of course I had to tie a rope around the vise grips, or they would have fallen down under the steering mechanism into no mans land. The I removed the bilge pump. It struck me as a good idea to either rebuild it and get a spares kit, or just buy a new one and a spares kit. Turns out it is a Henderson Mark V, the same model as the pump for my new head (toilet), I'll have to check to make sure, but if the parts are all the same, then only one spares kit for both.

Back from Canadian Tire I continued to cut out stuff. A little scary at times, but not too bad, except for the itches from the fiberglass. But man, what a difference when you have the right cutters for the right job. It only lasted 20 mins though, and then my grinder started smoking and died. Its always bad when the smoke comes out, because you can never get it to go back in. Learned that working in the electronics world for 20 years. And once the smoke is gone, stuff just never works the same again. So, off to Canadian Tire again. The old grinder was about 20 years old, and I think I only paid about $15 for it, so its hard to get upset about it. The new one is a Dewalt, better last!

Below is a picture of the table I started building. Marine grade ply for the table, hickory for the trim and fiddles. Its a little small, but it fits the binnacle protection bar. Have to wait until its finished to see how it fits.
 The cup holder worked great. I have to add a little mount to the top so that I can attach the chart plotter mounting base. Then finish it with Cetol. Looks good with cold beer sitting in it, doesn't it?
 The following is a pic of where the port quarter berth used to be. It was a little unnerving cutting the liner out when there was only an 1/8" between it and the hull. Not one scratch in the hull though. I have to raise the bunk about 4" to accommodate the new batteries.
 And, whats left of the galley. Tomorrow I'll remove the remainder of the galley, and then hopefully get all the mess cleaned up. I vacuumed a little before I took the pictures, but trust me, its bad.
 The first thing I did was the back seat in the cockpit. I removed the humped seat, and cut out all along the back. I am raising the entire back seat 8", and installing a propane locker in either side, one for a tank in use, one for a spare.
Its coming. Some people think I am going a little overboard, and I can't really argue with them, but its just who I am. Anyway, I am baked, and need to get some down time. Tomorrow I am hoping to get down to the boat early and get all the destruction done so the mess can be cleaned up and I can start he rebuilding.

Rob.

Tuesday, April 17, 2012

Bottom is complete..

Nothing too exciting yesterday. I was up early, so I put another coat of Cetol Marine Gloss on the ladder steps, and then taped the inside joints of the fridge box. I was thinking I might not bother putting glass tape on the outside of the box, because it is pretty solid. However, now that I think of it, I may be better off just getting it done. If the box is ever going to have problems, it will be in the seams, and I can't glass the outside after is already installed.
 Then Serena and I went down to the boat to get the last coat of bottom paint on. So now the hull is complete. We could launch her the way she is, if we had to. That is, after the knot log sensor is put it, the cotter pin is put on the prop nut, and the stuffing box is put back together. Mind you, I would like to finish the boot stripe first. The port side needs 3 coats yet, and the starboard side needs 1. Funny thing is, the only way to tell the difference between the below photo and the other pictures from the first coat is that this one is from the front, and the tape is missing from the edge.
 After spending 3 hours or so at the yacht club getting that done, we went shopping for the afternoon. What fun. Serena did however talk me into keeping the $50 labeler I bought for labeling all of the wiring in the boat. I am so glad she did, because it will make it so much easier to get the job done right. I am really anal about wiring. It must be done right, it must be neat, and it must be labeled judiciously. I have seen what happens when wiring goes bad. In fact, I would bet that almost every boat in our club has improper wiring, and most will have 16 awg lamp cord in them somewhere. Wiring burns more boats, and yet people are worried about gas engines. You can smell gas at least, and know enough not to light a match, but bad wiring gives no notice until it has burnt the boat to the waterline. Sorry, ranting again, I did say I was anal about wiring!
After we got home I was going to coat the fridge box with fiberglass cloth and epoxy, but the joints on the bottom were still a little tacky. I had set it on the concrete floor before we left, and I think that may have retarded the curing process. So I moved on to the drink holder that will be attached the binnacle support tube. I made it out of hickory, because I had it laying around, but also because I am seriously thinking about converting to tiller steering, although that's a discussion for another entry. If I made it out of teak, it would have been expensive, just to turn around and throw it out later. It needs to be dry fitted, and trimmed, then it will get 6 coats of Cetol as well. Might get to the cockpit table today if I am lucky.

After getting into my comfy's last night I worked on new wire drawings. I need a master schematic, but I also want to write out each cct, how it runs, connections, sizes of wire, terminals, etc... Maybe anal is not a strong enough word.....

Later. Rob

Sunday, April 15, 2012

Building the Fridge

We knew that we were going to have refrigeration on the boat, that wasn't an option for us. Serena doesn't feel comfortable with certain foods not being cooled, no matter how many people tell her its okay, and I like cold beer, cold apples, cold pop, and a lot of other things, important things, things no man should have to do without, essentials of life, like ice cubes for rum and cokes.

So last Aug, we came across a deal for a Nova Cool RT6 icebox conversion kit with the small .6 cu.ft. freezer box, just like Ralf Kramden and the ol' ice box. There are a lot of different systems out there, and I chose this one because it was the one that appealed to me the most. Light on power, very capable in a small box situation, no thru hulls, rather inexpensive, and I could build the box the way I wanted, with 6" of insulation.
Sometime between when I had those grand ideas, and now, reality stepped in and smacked me in the side of the head. A Bayfield 29 is not some cavernous 6000 sq ft log chalet in the mountains, its a little boat, with little spaces. Does anyone have any idea how much space 6" of insulation actually takes up. Well I do, I figured it out, and its tremendous, its huge, its also not going to happen in a 29' boat.

So I have had to make compromises between the size of the fridge, the amount of insulation, and the amount of power needed to keep it going for a day in the tropics.

I have some code board left over from building the house. It is R9 and 1 1\2" thick. So, 3" is R18, and 4.5" is R27. Very respectable values, and the board is foil backed, so it helps seal up the insulation a little better. It works good on the house, we can almost heat this place with a candle, and cool it with the fridge door open.
So, the compromise. I ended up with a 3 cu.ft. box. Part of that is freezer, about .6 cu.ft., and the remainder is is fridge. Its not much bigger than a large cooler, so that helps make it easier to cool, ultimately decreasing the power requirement. The insulation is 3 layers thick of code board, or 4.5" on the back, the right side beside the stove, the top, and the bottom. The front and the side will be 2 layers at 3". Its amazing the difference in the volume just removing a single layer of insulation from 2 sides.
 So then I started building the box. There is a step up on the back side where the freezer compartment goes, in order to eliminate the area underneath that would be difficult to access, but also to maintain a good amount of insulation without the hull getting in the way. I used 1/4" marine grade plywood for the box. Normally I would wire it together before putting the internal fillets in as in stitch and glue, but the box isn't very big, so I just used masking tape.

The box is 19 1/2" wide, 17 1/2" front to back, and 18" deep. The step up reduces the depth of the box at the back to 14", and leaves a little space under the freezer compartment to get a hand under there to wipe up spills or what ever. Not huge, but it will have two small baskets in the top, one 4" deep, and the other 7" deep, for smaller items, and will effectively double the square footage.
Here is a picture of the epoxy fillets. I made a piping bag out of a plastic bag, and faired the corners with a tongue depressor. Tomorrow I'll tape the corners with 2" fiberglass tape. After I get back from painting the second coat of bottom paint on the boat.

So according to my calculations, with the help of Nigel Calder's book, I figured conservatively that the fridge and freezer will use about 32 Amp hrs per day. We can get that out of our solar panels alone. I expect that the number will be much lower though on average, down closer to about 22 Amp hrs, but time will tell.

My biggest concern is that because the the box is so small, that I may have a hard time keeping the stuff in the freezer frozen without freezing everything in the fridge. According to the documentation for the Nova Kool, I could use this as all freezer too. I may end up putting a divider between the fridge and freezer part just slow the transfer of cold air. Have to wait and see.

Also got my first coat of Cetol Marine gloss on the ladder steps. Man that stuff stinks. I was going to use it down below in the boat, but it would kill me, so I think I'll find a water based low odor varathane instead.

And the saga continues...

Rob

We have boat bottom...

So I went to the boat on Wednesday, I had a weather window and needed to get the bottom finished. I had a recommendation from Rick, the guru of gurus, to get the bottom done now, because it takes a couple of weeks for the Interlux Interprotect 2000 to really set up. Otherwise it can let go when the crane straps put tension on it. I wanted to finish the boot stripe first, but is takes less time to set up, so can be done later. I probably won't get in the water until second lift in anyway, which is still a month away.

I must digress a little here, because Rick needs more mention. This guy has forgotten more about working on boats than most of us will ever know. Having him around the yacht club is like having the product engineers from the company in your hip pocket. This is what he does for a living, he works on our boats. I don't think he does engines, but other than that, if its on a boat, he'll do it. I personally like just talking to him about boat maintenance, sailing, and cruising, just because its a subject I love, and he knows so well. The only thing that really bothers me is that this is what he does for a living, and every little thing I learn from talking to him makes feels like I'm stealing something. I think he actually enjoys it, and doesn't seem to get too upset when people do something contradictory to his advice, which is usually bang on. In fact, going against his advice, although not infallible, is just asking for trouble. Ode to Rick, thanks man..

So, I get there Wednesday, after spending most of the morning loading the truck. Its raining.... ughh. In fact we had squall after squall come through, and I never got anything done on the boat. I spent all afternoon running around trying to find buss bar for my high voltage circuits, to find that the only way I am going to get them is to order the proper buss bars from "Blue Sea" at the marina next door. I worked my butt off on Thursday, Friday, and Saturday though, and got it all done up. See pics below.

Got the trailboard back on, it turned out well. I am going to leave the screw holes unplugged, as I am thing about removing the bow sprit next year and replacing the main timber. The previous owner had a little rot in there, and scarfed in a couple pieces of spruce, but I am not happy with the way the job looks, and would rather have a new one. We'll see, maybe it will be fine.
 Taped off and started painting the white stripe through the red racing stripes. I couldn't effectively tape off the curly part, so I put 2" tape over the whole thing and used a new utility knife to cut the tape where the depression was. Worked out really well, except for the bleed thru I ended up with.
Looks great from ten feet away though don't it? Up close it isn't so pretty, but I will try some little touch ups and see if I can't fix it up a little. Or wreck it completely!! Three coats of Interlux's brighside off-white. The red was four coats. I put the first coat of off-white on without thinning, and my recommendation is, don't ever do that. It went on okay, but it didn't flow well, and the finish was not near as good as when I thinned it 10% with the proper thinner.
 Here is the bottom after 3 coats of Interprotect. I did 4 total. The manufacturer recommends 4-5 coats, approximately 4 gallons for a boat my size, however it also says until the thickness of the dried material is 10 mils or more. Well...... what a controversy this creates. I had an epoxy barrier on the boat to begin with, so I was fairly confident that I could get away with a little less anyway. I asked at least 15 different people how thick 10 mils was, and not one person new exactly how much that was, funny perhaps, but some of the guesses were at least right. When I got home I Googled it, and it is in fact another way of saying "10 thousands of an inch". American speak I guess. Up here in ol' metric Canada, those things are apparently a mystery to us. The controversy was that Rick"the guru" said that the thickness should be between a dime and a nickel. As I said earlier, going against Rick, is like pissing on the Gods, but I measured a dime, at 44 mils, and a nickel, at 66 mils. So, in fact a dime is 4 1/2 times the required thickness required by the manufacturer in order to have a water tight barrier on the hull. I was so nervous about going against Rick's recommendation, that I almost didn't put the first coat of anti-fouling paint on the bottom when it was ready. The anti-fouling paint needs to be put on in the same day as the last coat of interprotect, so that they bond properly. Anyway, long story over, the barrier is thick enough, and it only took 2 gallons, 1/2 gallon per coat, and I painted the anti-fouling.


The final pictures of the first coat of anti-fouling paint. Black, Serena's choice, but it looks really good. I need to wait a couple of days to put the next coat on, and then it will be good for the season. I used Interlux's Micron CSC. It is okay, in fact for Canadian waters, its serious overkill, but the recommendations from other sailors is to use the upgraded version called Micron Extra VOC. As far as I can tell, the two paints are identical, and can be applied over one another. The only difference is that the Micron Extra has a Biolux additive that controls slime buildup. Unfortunately, Micron Extra is not available in Canada. So I will put a coat or two of that on next year before we leave for the Caribbean. I have a funny feeling that I will be moving the waterline up this fall anyway. Once all that cruising gear is added on, Vita is going to sit a little lower in the water.

Other than than, I redesigned our fridge, because the space was smaller than I thought. I start building that today. I designed a cockpit table. Figured out where my batteries where going to go. Came up with a preliminary design for a new table and seating that keep the original setee on the starboard side but get rid of that god awful table in the middle. Cleaned up the interior of the boat. Finalized the design on the high voltage panel, and determined the location, I think/hope. Installed the new Raymarine ST40 knot log. Although I am a little concerned that I didn't get enough sealant around the thru hull. I might see if I can't remove the locking nut and add some more sealant. Drank a few beers, and worked my ass off. I didn't get everything done I had hoped, but its coming. At least the outside of the boat is starting to look really sharp.

Kisses.

Rob

Wednesday, April 11, 2012

The Collage

Sort of... I am just making a blog entry from the pictures that are in the camera, because I am off to the boat for a couple of days to get some more work done.

I went to Pride Marine in Kingston yesterday, my batteries were in, picked some more paint, a Raymarine ST40 knotlog (yep, I broke down), and a few other little things. Man this stuff adds up fast. It was a somber ride home. Good news is that most of the major expenses are now done. I hope...

 The depth sounder thru hull. A Raymarine ST40. My only headache with this is that I had to remove the old thru hull socket, and permanently mount this one. Sucks if I ever have to remove it, but that's what came in the box. Turns out it wouldn't have mattered though, as the Raymarine insert is different than the old SR Mariner. Now with my recent acquisition of the knot log, I will have to put that one in too. However it came with a removable sensor and socket. 
 This is just a picture of some dents in the hull I am attempting to fair out. The hull was actually in really good shape for being 30 years old. I just have to sand them down before I start the epoxy work.
 Here is a pic of the cutlass replacement, the only one I have, and all it shows is there is nothing there. How exciting.
I took the wooden steps from the stern ladder home, sanded them down and started putting Cetol Marine on them. I finished the third coat this morning, and I will put 3 coats of Cetol gloss on later to further protect them. Nicest thing about Cetol, no sanding.
 The next few pics are from painting the hull stripes. One above, is the first coat on the port side. The next two are the third coat on the starboard side.

 Using 2x6s and wedges to help steady the hull, as the pads are not really touching. Unfortunately with this cradle, the pads are right on the waterline, which is also getting painted. I am going to cut up the cradle after lift in and make the four corners into jack stands. They will be easier to handle that way, and I can move them in a little more. I find that if the pads are sitting on gelcoat then they tend to increase blistering.
And here we are, four coats and the tape removed. Vita has racing stripes. Jimmy says that racing stripes on a  Bayfield is an oxymoron, hard to argue that one. I need to wait a few days before I tape off the little 1" white stripe that runs through the middle of the big red stripe. I don't want the glue from the tape to ruin the finish on of the red, so it needs to be well cured.
 This is what I found after removing port trailboard. The holes in the bow are there for access to the bolts that hold the bowsprit. I though that they were put in there by a previous owner, but I'm told that all the Bayfields have them. However, mine were leaking because a previous owner used silicone to seal them up. When are people going to learn that household silicone has no place on a boat, especially on the outside. That's why they make all those neat, really expensive marine sealants. One of the other Bayfields in the club has the trailboards sealed all around the outside, but that scares me a little because if water does get in there, there is no way for it to get out, and lets face, water seams to have a way of getting in anywhere it wants.
So my solution was to ground out a 3/16" recession all around each hole, and use 3M 4200 to seal in a couple of aluminum plates. Easy enough to remove, but keeps the water out. Then I will put a dab of 4200 on each of the screw holes before I put the trailboard back on. Seals the screw, and leaves enough air behind the trailboard that I won't have to worry about water being trapped in there.

This week I will finish off the red painting of the water line. Tape out the 1" white stripe, put the trailboard back on, install the knot log, sand and start finishing the bow sprit. Maybe start designing the nav station, the galley, fix the cockpit cubby I tore apart in the fall because it was saturated with water, and glass in a shelf above the stern tube to mount the starting battery. Wow,,, that sounds like a lot. I get done what I get done, and maybe I'll remember to take pictures. ha ha

Rob

Saturday, April 7, 2012

Progress ... That's what they call it....

Okay, I know I said that I would take pictures when I put the cutlass back together. And it looks like I lied... Sorry.

It's not that I didn't intend to, but everything just happened so quick, and I was so short of time that I just didn't get it.

It went well though. I installed the cutlass bearing at home into the stern tube, cut it off with a hacksaw and then ground it flush. Tapped it back out after marking the spots where the set screws go, drilled a little dimple in each side, and then put it back in. Added some locktite to the set screws and put them in. All done.

I replaced the packing in the compression nut. I went with the teflon, looking for a little tougher seal. cleaned everything with a anti-rust stuff, and got it ready for installation today.

I put everything back together at the boat, and Serena gave me a hand to get the screws into the stern tube. Turns out one bolt needs to be slightly larger than the other, so the threads didn't quite hit the nylon lock on the nut. Its okay though, the one we took off was just a regular nut, but with a little bottom paint, it should stay put.

Added some anti-seize to the set screws on the shaft coupling for the engine. These were a pain to get out, and one of the other Bayfields in the club hasn't been able to remove one. I don't want to be in that position. Its wired up so that it can't move anyway.

I still have to tighten the clamps that hold the rubber hose for the packing gland, and I bought the wrong size cotter pin for the prop nut, but otherwise, she is ready to go. I used 4200 sealant around the stern tube and bolts. I will definitely be removing this again. Probably sooner than later. There was some wear on the shaft from the packing gland and the cutlass, and even after installing the new cutlass bearing, there is a slight movement in the shaft. I can foresee that we will probably be replacing the shaft in the next couple of years. Fingers crossed that it lasts a long time though.

Then I put a third coat of paint on the hull stripes. Using red to cover up dark brown is taking a lot of paint. Hopefully 4 coats will do it. I actually have a couple of pictures of the paint, but I don't have the camera handy, go figure. next time.

Until next time.

Rob

Tuesday, April 3, 2012

Tool Boxes

It was driving me nuts loading up the truck with everything for the refit. So today I decided to build some pull out tool boxes in the back. Now I can hold most of my stuff in the boxes and still put sheets of plywood in, or whatever else, and don't have to climb all over inside of the truck.


Tomorrow is a trip to Pride Marine in Kingston to pick up the new battery boxes, order the batteries, pick up all the wire to rewire the boat and mast, and some other odds and sods. Also planning on hitting Atkins and Hoyle in Napanee. Turns out they made our windows, and we need new screens and rubber seals. Plus, we are hoping to get to the textiles plant to look for some fabric to upholster all of the cushions. Pheewww...

We started talking about replacing the one settee on the Starboard side where the galley is with a dinette and a fold down table. It will create a better sitting situation when at the table, and should make for a bigger bed with better access. That center table is big, and right in the way. That means I have to remove the door to the head, but I think I'll move it to the other side and open it into the head. Don't really know yet, but its way down on the list of things to get done.

Later.

Rob

Spring is in the air...

More work on Vita. Its starting to get to that temperature where I feel guilty if I don't accomplish something.

I took a couple of pictures of the puller I made to take off the prop. Just in case someone was curious. Again, 5/16" plate and 1/2" rod. I think the sides were around 4 3/4", long.


I also made my first tool bag for the boat. I wanted something tough, but small enough that I could slide it into some tight hole for storage. So the following is what I came up with. I made the buttons out of oak dowel, the zipper just came from the local sewing shop, the rope was left over polyester 3 strand from my sail kits, and the bag is made from marine canvas. I'll try it for a while and see how it works. Right now it is carrying my sockets and wrenches. Its 16"x6"x4".


Serena and I managed to get the cutlass bearing out yesterday, but I forgot my camera at home, so I will make a post with pictures when we put it back together. It was a pain in the butt, however it wasn't quite as bad as I thought it might me.

I also started looking at my anchors, because I realized that I wasn't 100% sure what they were. I noticed in an old post that I had wrote one thing, and then on the Bayfield news group I had put something else. So yesterday I weighed them, and tried to figure out exactly what they were.

The stern anchor was easy, its written right on the anchor. It is a Danforth S920, which is a 14 lb anchor. However, when I weighed it, it was only 12 lbs. Perhaps not the best scale, so that may account for the difference.

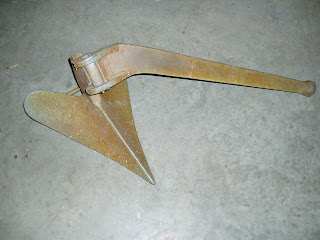
The primary anchor I thought was a 45 lb CQR. Well, it weighed in at just barely over 40 lbs, and I don't think it is a CQR. It is a hinged plow (CQR type), but I think it is a knock-off. Its probably sold as a 45 lb anchor, because the only 40 lb plow type I can find is a Mason, and it doesn't look anything like the one I have.

The secondary anchor is a 25 lb, and it weighs exactly 25 lbs. I think it may be a CQR, either that or a very good copy and is still a nice little anchor. I read an article online that said anything less than 25 lbs in a hinged plow type anchor was useless. Apparently these things need weight to work properly.

I also weighed the chain just for the hell of it. The secondary has 30 feet of 1\4" HT, that weighs in at around 25 lbs, and the primary has a 130 feet of 1/4" HT weighing in at around 100 lbs. So a quick tally shows the weight of ground tackle on the bow including the 25 lb Lofrans Royal Windlass, is,,,, 215 lbs. Not bad really. I suppose there will be a little more added weight with the 450 feet of 1/2" 3 strand nylon rode as well. But hey, it all still weighs less than I do.

Until next update.

Rob