We've Moved

HEY EVERYBODY, WE'VE MOVED

Our blog had gotten too large, and it was getting to the point where it was difficult to comb through looking for specific posts or information. So we have developed a new blog at SailingVita.ca Come and see whats happening now.

Sunday, March 11, 2012

Sails All Done

Woo Hoo..... All done. Although, I am gonna miss it a little. It was fun. However, I have a lot of other things to do, so onward and upward. I was going to modify our tent a little for backpacking before getting on with other boat things, but I found out today its not going to work, so I guess I'll have to buy a new tent instead. That means tomorrow I am on to dinghy modifications.

Serena gave me "what for" the other day, because I have made it sound like the sails were easier to make than they would be for someone else. I have this horrible inability to believe that I am capable of doing things that others can't or won't, don't know why, simpleton complex or something, (I just made that up). But for some reason I always think that if I can do it, so can everyone else. I am not going to change that, but I will say that I have a lot of experience doing these sorts of things, and the skills needed to make the sails have developed over a lot of years. When I was in basic training for the military, the only compliment I received during the whole ten weeks was about how well I had sewn my name tags in all of my clothing. My squad supervisor was concerned that he might rip out his finger nails, if he tried to pull off the tags, as he had with several others. One year I actually made my own hockey equipment, and I was a goalie. I was playing against some very good players, some of which had even played at the junior level, so that puck was moving. I have fabricated so many things over the years out of fabric and hardware; quilts, bags, wallets, a boom tent for our last boat, and I modified our sails on our last boat, including give the mainsail a roach-ecotmy, getting rid of those nasty battens. Curtains, (shower and window), recovered furniture, made tarps, modified just about anything you can think of. I have more needles, thread, and accessories than you can shake a stick at. Two sewing machines, and my poor old Kenmore has been put through hell over the years. I don't even know how it survived this long. So, I have a lot of experience, most of it gained by trying, screwing things up, and trying again. Moral of the story, yes making the sails was relatively easy for me, however, if someone would like to try and make their own sails, they should assess their own abilities first, or do lots of learning. My lawyer made me say that.

30 hours, almost to the minute. Not too shabby if I do say so myself. I also did a little repair to the old mainsail, a grommet had popped out, so I sewed a piece of dacron tape and put in a new grommet. Plus I folded up the sails all nice and bagged them up.

Its a really nice looking sail. My only concern is that maybe it is too heavy. In light airs it might be a little irritating, and it probably won't fill well. I console myself with the fact that I have a nice reacher though, to handle those light days. And I am actually thinking of making a nylon mainsail. That way we can fly it when the winds are light and fluky, and the sail won't slat about.

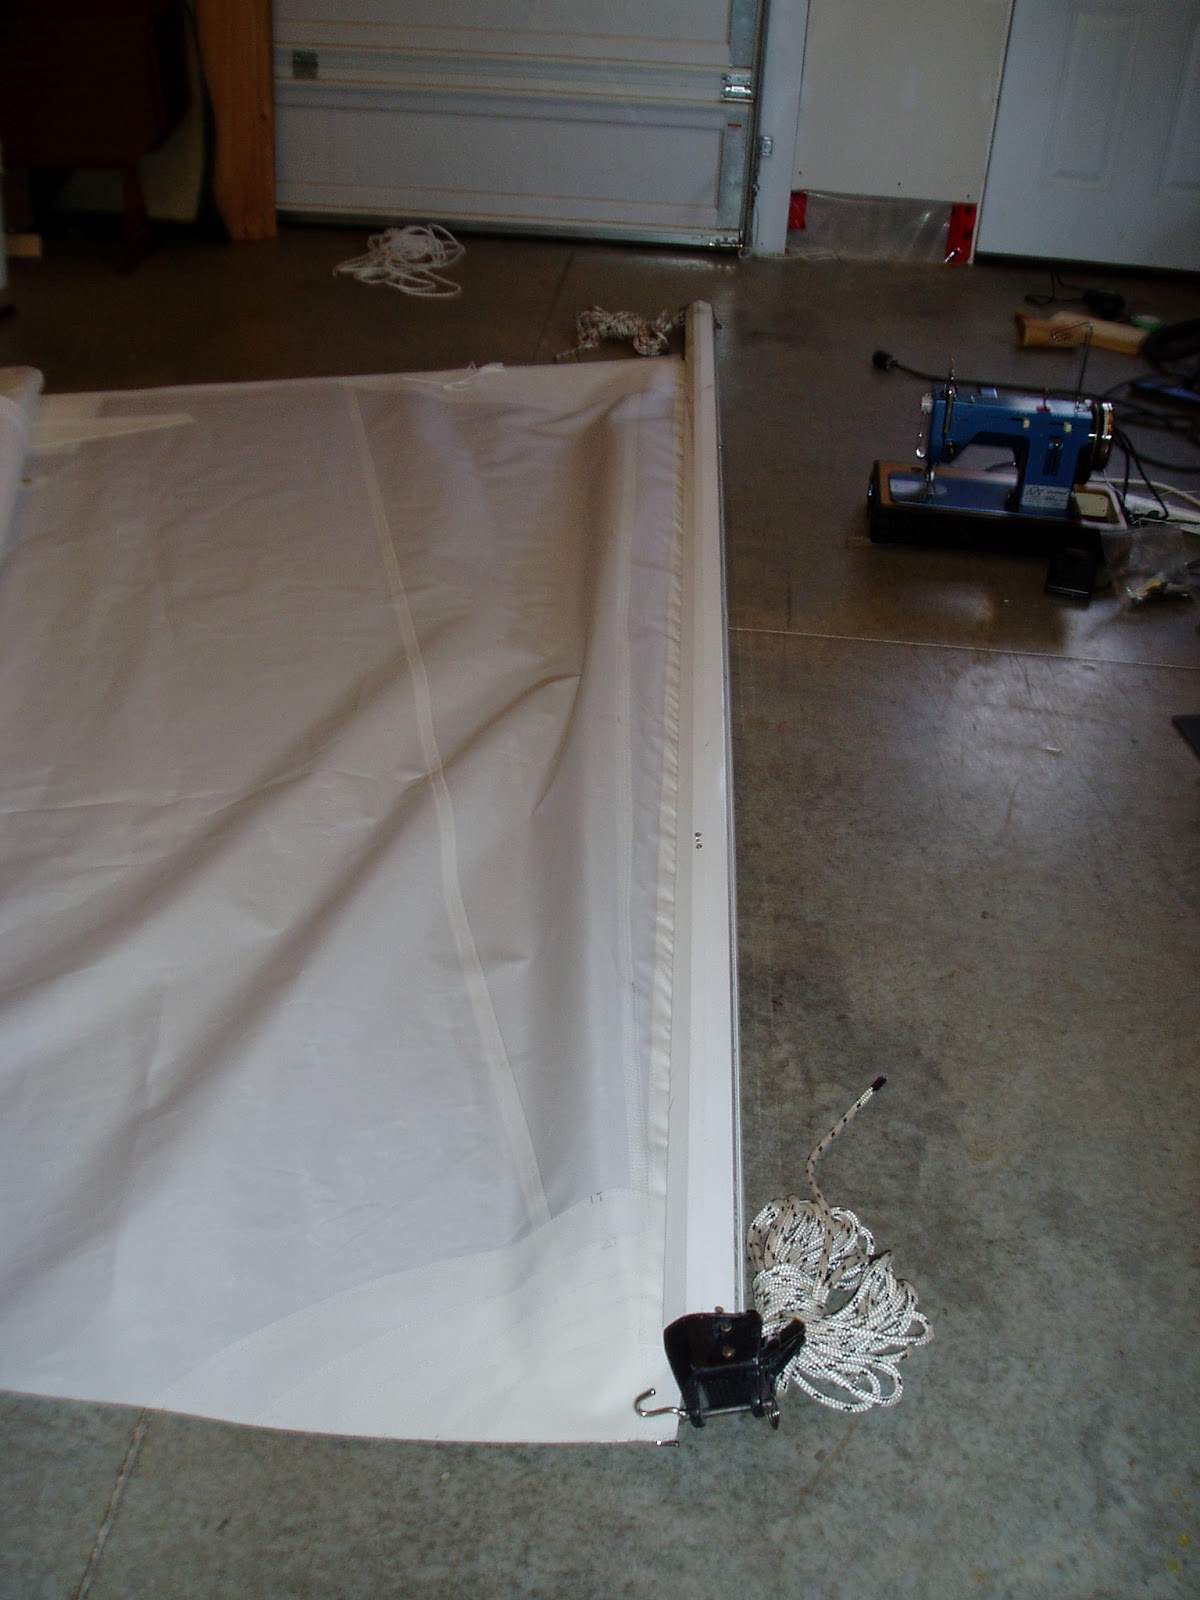
 Here is one of the regular sliders. The webbing holds in on while allowing the boltrope to move inside the sleeve of the sail.
 And this is the one steel slider. Don't know why this one is steel, and the rest are plastic. Maybe if something gets stuck in groove, then the steel is stronger for knocking it out of the way.
 Here is one of the leech reef points. I used the same chafe protection as the luff since the abrasion comes from the same direction. There was enough leather in the staysail kit in order complete all of the required protection on both sails, except one of these grommets, so there is a lot of leather left over. Spares kit!
 These last few pics are of the completed sail. Not very flattering, but I'll get a picture of them flying from the mast in a breeze, after the boat gets in the water.


I also put another row of stitching all the way around the staysail. It was a pain, because I had to stop and go around all the hardware, but I feel much better knowing that the sail is that much stronger.

I can't say enough about the sailrite kits. I was proud to put their logo on my sails. Sure the instructions were a little wonky at times, but the computer cut pieces were perfect, and they gave me enough spare stuff to almost make another sail. Extras included, 200 feet of seamstick (which is a god send). I am digressing again, but making a sail like this without a proper sail loft could only be accomplished with the double sided seamstick  tape that holds everything together while it gets sewed. 3 - 4oz rolls of V92 polyester thread, and that's a lot of thread. 7 - #2 grommets, 2 square feet of pearl grey leather. A roll of sailmakers 5 ply waxed twine, each kit came with one roll, I used one for two sails. 3 number 16 hand needles, the kits came with 4 and I broke one. A few feet of tape, and about 4 square meters of 7.4 oz dacron fabric. The only thing that kind of threw me off was the machine needles. I bought about 100 of them different sizes, so I wouldn't run out, and I broke one during the whole process. Guess I have enough needles for a lifetime. That's good though, because you can't buy them anywhere around here.

All that's left now is the cleanup. Ughhh, my favorite part.

Thursday, March 8, 2012

Mainsail Part III

I once read somewhere that it was bad luck if a sailmaker didn't bleed on his sail. No worries here...

The staysail has a few little stains on it, but the mainsail had remained blood free until today. Oh, it had cut me, the edge of dacron ripping through the flesh under the fingernail, but I didn't bleed on the sail. Today I shoved the hand sewing needle into one of my fingers. Just a little prick, but enough to get the job done. So I guess I can considered the sail christened.

Spent an additional 6 hrs on the sail today, so that makes a total of 24 hrs. I don't think it will be done in 30, but close. 6 hrs really didn't get me as far along as I had thought it might. Of course if I didn't screw up, then maybe I would have more done. I had bought extra grommets, both large and small so that if I, sorry; when I made a booboo, then I would have the parts. I crushed one of the large eyelets today, splitting it and cutting several of the strings around the ring. So I had to carefully cut the eyelet out using a hacksaw blade taking care not to damage the leather or the sail. Then I had to redo the entire ring, eyelet, and leather. Hope I don't have to do that again.

However, I finished all three corners, and got one of the reef points done.

 The head. What a pain in the buttocks. Everything was so tight, and the leech line was in the way, and there are 11 layers of cloth. But I got it done. Doing the head like this with the boltrope going around the head and down the leech 3 feet cost me about 4" of sail length, but it is a tough setup, and I never have to worry about getting the headboard caught on anything. That's how we can raise and lower the main on any point of sail, not just into the wind.
 Head with grommet and roped.
 And, the sacrificial leather to keep the chafe down.
 And here is the clew with its outhaul slug. This one took some pre-planning while I was doing the boltrope, but it turned out really good. There is a lot of stress on this point of the sail, so it needs to be tough. In comparison to my current sail, this is like Abram tank tough.
 The tack is a little less exciting, but still a very tough setup. These sewn in grommets are so much better than a hydraulic press fit grommet that you normally get on a production sail. There are 3 to 4 times as many stitches than hydraulic pins, and the stitches are varied in length, one short, one long, one short, one long, all the way around. I actually sew all the short stitches first, and then the long ones, but the effect is the same. Grab more material and spread the load out to the sail.
Here is the first tack reefing grommet. See the one I had to cut out of the whole before I redid it and got it right this time. Figuring out how to do the leather was interesting. Emiliano's book didn't say anything specific about mainsail reefing points, and the ones for the foresails have the loads in different areas. So I came up with this one on my own. The rope that hauls down the reef pulls down and slightly forward, so that is where I put the chafe protection.

Only 5 more reefing grommets to go, and then I pack the sail up until lift-in, end May.

Should have it done tomorrow, but who knows. I have to walk to town for groceries, so that will eat up a few hours. Good exercise though, even if my neighbors think we're nuts. Oh crap, I forgot, I have to do the luff grommets and all the sliders which have to be sewn on, that will take a little extra time. I'll get er' done eventually.

Fair winds.

Wednesday, March 7, 2012

Mainsail Part II

18 hours in, and it now looks like a sail. All 9 panels are together, all the patches, the leech line and cleats, the foot and luff boltropes have been sewn in and hand stitched at each end to hold them in place. All that is left now is a little piece of edging that will overlap the boltrope as it goes around the head onto the leech. I should have pictures of that tomorrow. Then it is on to hand stitching. 9 sewn in rings, leather, outhaul slug, and all the sliders for the mast track. Its a lot more hand work than the staysail.

I've also decided to put the staysail back under the sewing machine. The tapes along the edges were only sewn with a single row of stitching. I doubled them up on the main, and I think I like that better, so I am going to add the second row of stitching all around the staysail too. It didn't call for it in the instructions, but what can it hurt.

So, I got two 4oz rolls of thread with each sail kit. Today I finished the first roll, and both sails are pretty much done. Funny thing is, I ordered an extra four 4oz rolls for future projects. It'll probably be a hundred years before I need to buy more thread.

The directions for the mainsail were horrible. I thought they were really good when I first read them, but after trying to follow them while building the sail, I realize they were missing a lot of info, some of it was wrong, and some of it just wouldn't work on this sail. Luckily I had done the staysail first and had some idea how it should go together. I studied my existing main, and did a lot of digging in Emiliano's book, but I figured out how to do it right for my application. I was really surprised how poorly my existing mainsail was put together in comparison to this new one. I guess it was designed for sailing around the great lakes and not for offshore. I picked out the weak points and made sure that the new main does not suffer from the same problems.

 An old pic from early on, sewing the intermediate reef patches. I thought it was strange that these patches were only 3" square, while the ones on the staysail were 4" square. I guess there isn't a whole lot of stress on these points. The sail isn't that wide at the reef points. I know that in many cases, people don't even bother to tie them up.
 All the big parts put together. The reinforcement patches are all done, its ready for some edging to finish it up.
 After putting the leech tape on, the leech line and the cam cleats, I went ahead and finished the foot of the sail with its boltrope. Then I thought, what the hell, lets see how it fits in the boom. Like a glove. Makes my heart go pitter patter. The extra material is the draft.
Poor picture of a cam cleat. They are the exact same setup as the staysail, only this sail has 4 of them, one for each reef and one for the whole sail.

Much fun.... However, I am looking forward to getting it finished so that I can move onto the next project. The real excitement will be when I bend them to the mast and let wind fill them up. Ahh, the pain of waiting.

Its supposed to rain tomorrow, so I plan to get lots of the hand work done. I would love to finish the sail, but that might be pushing it.

Until later....

Monday, March 5, 2012

Mainsail Part I

No pictures today. There hasn't a whole lot exciting. The main is the same as the staysail, as far as the general construction. I have the first 5 panels together, all of the intermediate reef patches are sewn in with their grommets installed. The first two sets of reefing reinforcement patches are done, two for the leech and two for the luff. Man, are the patches huge. I wanted a bullet proof main, and I noticed today that the kit is an offshore kit, so I guess that means I got it. But the leech patches are 6 layers thick with the largest patch being over 3' long. It is a royal pain to get through the sewing machine, can't wait until those are done. So far, 7 hours, plus maybe another 2 reading and figuring.

I was trying to figure out how I was going to reef the sail, so that during the process of making it I could engineer in the required stuff. Primarily I was trying to figure out if I needed a jack line on the luff so that I could get the reefing cringles down to the boom where they are supposed to be. My current mainsail has a jack line, but I don't think I will put one on my new one. I am just going to try and make sure there is sufficient distance between the reefing cringles and the next grommet, so it will reach. Worse case scenario I can always add the jack line later without any serious modification to the sail.

So, ideally I would be able to reef the mainsail from the cockpit. I personally prefer to have it at the mast, but the winch is already mounted on the cabin roof under the dodger, so what the hey. That means that the lines run through the boom are a waste, I will have to add 3 lines to the mast with cleats to hold them, one for each reefing line. The clew end I can do by hand right in the cockpit, except for maybe the last reef, but we'll have to see when we are rigging the boat. Who knows, may change it all around anyway. Would love to have my halyard winches on the mast, and may yet.

More mainsail later....

Wednesday, February 29, 2012

Vita has a new Staysail

Do blogs have limits for the number of pictures? I hope not. Because if they do, this post will be over it for sure.

I finished the staysail today. I didn't keep track, but I figure somewhere around 30 hours to complete. About 3 times faster than I had originally thought before I started all this. Of course, having never sewn a sail before, I didn't have a valid frame of reference. It was however, a blast. I really enjoyed it, and I am hoping to start the mainsail tomorrow. I think I will try and keep track of the number of hours I it takes me. The only real problem is that I am now a seasoned sailmaker, and it will not be a true example of how long it takes for a rank amateur to complete a project of this type. Oh well, I'm over it....
A few posts back I wrote about making my new sewing palms. Emilian Marino in his book said that you needed two palms. A seaming palm and a roping palm, but to be honest, I really didn't see the need for the roping palm; until now. I was using the seaming palm to do the hand sewing, but my hand was getting sore pulling on the wax twine. Then I remembered that the roping palm had the added piece on the thumb to provide support for putting some good pressure on the twine. It took a bit, but totally by accident I started using it the way it is supposed to be used, (I think), and I got through the whole sail without and pain in my hand. So, I change my previous statement of, "you can't sew a sail without a palm", to, "someone would be insane to try and sew a sail without a roping palm."
 Here is a picture of reefing grommet on the luff. There was nothing in the instructions about adding chafe protection for the reefing grommets, and I didn't think of it until after I had installed the two on the luff. Luckily, the luff has the least amount of chafe. It is attached with a large shackle, and it doesn't move around much. Mind you I couldn't leave it like this, so I had to come up with something.
 Here is the leather rapped tack. 
 This is what the head looked like before the leather chafe protection covered it up.
 This is one of the two leech reef points. These ones are subject to a lot of bashing around. Stays, shrouds, stuff on deck, life lines, etc.... Its always moving around, so it needs some good chafe protection. I got the idea for this one out of Emiliano's book. He recommended covering the whole grommet with leather prior to putting the thimble in, but there wasn't enough room for the thimble. So I had to go half way with the leather, and then put a second piece on the backside, over-top. It should work nicely.
 The head after being rapped with leather.
 My answer for the luff reef points. The leather protects the edge of the sail, and boltrope. There isn't a lot of chafe problems here, as mentioned before, but this will take care of the sensitive areas, and I didn't have to cut out the thimble and do it all over again.
And the clew attachment, finished. There are three separate pieces of leather on this to protect the stitching. The directions didn't call for it, but Emiliano's book recommended this setup. It made sense to me, so I went ahead and did it. There was lots of extra leather, so what the hey...
 Crappy picture, but the spur gromments were installed  as the directions indicated, and the snaps were put into place. There was no chafe protection for the snaps, like the usual little pieces of plastic, but these are easy to remove, and if I notice any chafe, I'll have to put something in between the snaps and the boltrope.
 I couldn't get a picture of the whole sail, so here are a collection of shots showing the finished sail.


And lastly the Sailrite logo. Its a sick on, and it is supposed to stay put. In the videos on their website they always sew them on as well, maybe I will later, who knows.

All done. One of the gentlemen in my yacht club warned me about attempting to make my own sails, saying that I had better leave it to the experts. Kind of like mortals messing about in the world of the gods. But I have to say, this was really quite easy, especially considering it was my first time. I will admit though, that if I had to design the sail, and cut out all the panels, it would have taken a lot longer, and the results would not have been anywhere near as good.

The true test of course will be out in the big tank. Now if this wintry stuff will go away so the boat can go in the water, and the mast up, we can try out this new sail.

Fair winds...

Monday, February 27, 2012

Staysail Continued... Part II

Its been a good day. I didn't spend a whole lot of time on the sail, but I accomplished some big milestones. I finished the foot and the leech tapes, installed the boltrope, including the eyelets on either end and the first of 7 sewn in rings in the tack.
 The sewn in tack, spliced around the thimble and hand sewn to the sail.
 And this is the head eyelet. notice the boltrope sewn tight against the edge of the sail. As recommended, I used a zipper foot, and moved the needle over as far as it would go in order to get the rope in tight. The neat thing though, is that it was the last stitch the machine will make on this sail, (except adding the logo), and it really made the big lump of material actually look like a sail. Its really cool.
And here is the first brass ring sewn in and sewn to the eyelet. The brass ring gets 2 rows of stitching around the outside, an inner and outer, to really distribute the load. The only thing left for this corner is to add the leather patch over the stitching to prevent chafe.

I am really starting to get into this. Its a lot of fun. In fact, I am beginning to think I missed my calling. If I wasn't retired I would seriously be think of becoming a Sailmaker, or maybe canvas worker. I guess I'll just have to do it for friends, and they can thank me with beer, of course.

Till next time....


Sunday, February 26, 2012

Staysail Continued...

Good day. I managed to complete all of the patches. The second set of reef (clew and tack), and all the corner patches. I also got the rest of the panels sewn together. Its starting to look like a sail. The last thing I got done was the leech tape with the leech line and the 3 sets of cam cleats for adjusting it. I am getting much better at it, as I go, but it is still a pain in the behind. In fact, my ass is killing me from sitting on the cold hard concrete all day working on it. I have given my back a little break now by doing as much work in a standing position as I can, like basting the patches together.
When I install the leech tape and the leech line I was sewing through 8 layers of 7.4 oz Dacron and the 1/8" line, at the head of the sail. About 1/2" thick.  It was tough, but after a few broken threads and a broken #19 needle, I finally managed to get the 4 inches done with a #20 needle and doing all the back-stitching by hand. It wasn't that the machine wouldn't do the work, it was fine, but the action was a little rough on the needle and thread.
All done the reef patches. The sail is 138 sq ft, the first reef knocks it down to 102 sq ft, and the second reef brings it down to a measly 52 sq ft, about the size of a respectable storm sail, can't wait to see how it performs in a blow. 
 Finished clew reinforcement patches; so much easier than trying to sew one in the middle of the sail.
 Finished tack reinforcement patches.
Finished head reinforcement patches.
Not a very good picture. But I modified the cam cleat setup from the directions, and went with the style that I saw in the Sailrite videos on their website. It just looked a little better finished. The directions wanted me to cut holes in the leech tape to run the leech line through, and then sew webbing over them to protect the holes. The way I did it, I just put two different pieces of leech tape and overlapped them allowing the line to come out between the two, then back in at the next overlap 10 inches away. A cleaner look in my opinion.
See, I said it was starting to look like a sail. Tomorrow the foot, the luff, and start on the hand work, grommets, etc... This is a lot more fun than I thought it would be. Its cool to think that these hunks of fabric may one day carry me thousands of miles, and they were put together by me in my little garage in the woods.

Later...